Widgets

How to fix itechie A88 7-inch tablet stuck in boot logo


How to Fix iTechie A88 Android Tablet Computer unable to boot up and is stuck in boot logo.

iTechie A88 Android Tablet
iTechie A88 tablet stuck on boot logo - image by MZtech

“I couldn’t determine exactly what caused my Android Tablet to stuck in boot logo every time I turn it on. I haven’t installed any update or flashed its firmware.”


iTechie A88 Android Tablet Black
iTechie A88 Tablet (Black) - image by MZtech

Specifications:
  • Model Name: iTechie A88
  • Product Type: Wi-Fi Tablet Computer
  • Screen Size: 7.0” ; 800 x 480 resolution ; 5-point capacitive touch screen
  • Operating System: Android 4.2 Jelly Bean (upgradeable)
  • Processor: AllWinner A13 1.0Ghz ARMv7
  • RAM: 512MB
  • Device Memory: 4.0 GB NAND Fast Flash
  • Connectivity: Wi-Fi 802.11 b/g/n
  • Camera: 0.3 MP front ; 2.0 MP back with flash
  • Battery: 2000 mAh (milliampere-hour)

Hard Reset:
iTechie A88 recovery mode can be accessed by pressing altogether the power button, volume up (+) button and volume down (-) button. If you can access recovery options, all you have to do is select the reset to factory settings. It could fix “stuck in boot logo” issue.
“I tried accessing recovery mode but it boots directly and stops at logo again. If you are unable to access the recovery mode like me, you need to flash the stock firmware image to the device in order to fix it.”
Flashing Firmware:
Things you’ll need:
  1. Firmware image file
  2. LiveSuit v1.11 application for your flashing tool.
Download iTechie A88 firmware:
To make sure you download the correct firmware version for your Android tablet, check on the motherboard number /build number. Unlock download link below.
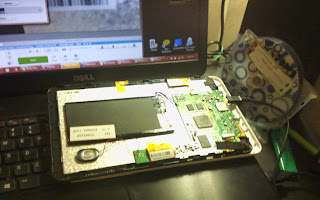
iTechie A88 motherboard
iTechie A88 motherboard build number - image by MZtech


How To Flash Firmware:
  1. Run LiveSuit application and click yes on whether or not to enter upgrade guide.
  2. Select General Upgrade Mode.
  3. Select Yes on Whether to select new image file.
  4. Browse and select the downloaded firmware image file.
  5. Make sure your tablet is off before connecting to PC.
  6. Connect tablet to Computer with USB (Universal Serial Bus) cord.
  7. Press and hold Power button and volume up (+) button.
  8. Release buttons once connection is detected by LiveSuit application.
  9. LiveSuit Flash Tool
    LiveSuit application flashing firmware - image by MZtech
  10. Flashing will start right away.
  11. Flashing will take a couple of minutes. Secure your USB connection to make sure your tablet doesn’t disconnect while flashing to avoid error.
  12. LiveSuit Flashing successful
    LiveSuit application flashing successful - image by MZtech
  13. You will see a prompt if the flashing process finished successfully.
  14. You can now boot your tablet by turning it on. (Note: first boot after flashing may take a little longer than usual.)
  15. The default language is in Hindu. To change it to back to English, go to settings –> select Language & input (letter A icon) –> select the very first option in the selection on the right side –> scroll down to find English and select it. ( change also the input language of your keyboard).
Your iTechie A88 Android tablet’s “stuck on boot logo” issue is successfully fixed.
Did this solution helped you? Please let me know by providing your feedback below. If you find this post helpful, don't forget to hit like or share buttons.

Widgets

Oppo Joy plus (r1011) stock Firmware


If you’re looking for Oppo Joy Plus (R1011) stock firmware / stock ROM, download link is provided below and learn how to use these downloaded file.
oppo joy plus r1011 mobile phone
Oppo Joy Plus (R1011) - image by MZtech


Where Can You Use Oppo Joy Plus Stock Firmware?

  • Fix Oppo Joy Plus phone that is stuck on boot logo.
  • Factory reset
  • Update firmware through recovery mode.
  • Fix other performance issues on phone related to software.

How to Use Downloaded Firmware File?

  • Flash it through recovery mode.
  • Flash it using SP Flash Tool.

How to Flash Through Recovery Mode?

  1. Download Oppo Joy Plus R1011 stock firmware / ROM .zip file.
  2. Save the downloaded file in micro SD Card of your Oppo Joy Plus phone.
  3. Enter recovery mode by turning off your phone, remove and re-insert battery, then pressing power button and volume up (+).
  4. Select update from SD card then browse the saved firmware file in micro SD card and select it to start flashing.

How to Flash Using SP Flash Tool?

  1. Download Oppo Joy Plus R1011 stock firmware / ROM .zip file.
  2. Extract the downloaded .zip file.
  3. Download SP Flash Tool.
  4. Run SP Flash Tool and click on scatter file. (scatter file is located in the extracted .zip file of Oppo Joy Plus firmware)
  5. Click on Download button, turn off your Oppo Joy Plus phone and connect to PC with USB (Universal Serial Bus) cord while pressing and holding volume up (+) button.
  6. Wait until flashing is done and you will see an OK pop-up from SP Flash Tool.
  7. Turn on your phone.

Download Oppo Joy Plus R1011 Firmware

R1011EX 11 A.02 - is the original stock firmware that comes with the device's factory state.

R1011EX 11 A.07 - is the stock firmware update.


Oppo Joy Plus R1011 firmware provided above is a stock firmware on a latest version – EX 11 A.07 and can be use to for updating firmware.
If you have some questions, feel free to post in the comment section below.

Widgets

How to Fix Lenovo A536 by Flashing Firmware


Fix Or Factory Reset Your Lenovo A536 By Flashing Its Stock ROM / Firmware

Front and Back Photo of Lenovo A536
Lenovo A536 Photo by MZtech

Lenovo A536 Specification:

Year Released: 2014

SIM and Network: Dual MicroSim, GSM/HSPA

Size (Dimension): 5.50 x 2.83 x 0.39 in , weight - 148g

Screen: 5.0 in Multitouch Capacitive Touchscreen, 16M colors

Platform: Android O.S. 4.4.2 KitKat

Chipset: MediaTek MT6582M

CPU: Quad-Core 1.3Ghz Cortex A7

Memory: 8 GB Internal, 1 GB RAM, micro SD up to 32 GB 

Camera: 5 MP (Megapixel) auto-focus with LED flash, 2 MP Secondary Camera, 1080p Video Resolution

Battery: Li-Po (Lithium Polymer) 2000 mAh (milliampere-hour), up to 300 hours standby time, up to 12 hours talk time

 
Why do you need to flash Lenovo a536 back to its stock ROM / firmware? There are various reasons but most of the time you need to flash it if:
  • Wiping it back to factory settings doesn't work.
  • Stuck at boot logo
  • Phone won't start up / turn on.
  • Forgotten pattern lock
 

How to flash Lenovo A536:

Things you need to download:
  • Lenovo A536 Stock Rom / Firmware.
Download Lenovo A536 Firmware File

  • SP Flash Tool.

  • Mediatek Drivers.


  1. Extract downloaded Stock ROM zip file.
  2. Extract SP Flash Tool.
  3. Run SP Flash Tool. Click on scatter file and load the scatter file found in extracted ROM file.
  4. Click on Download button.
  5. Turn off your phone and connect to PC using USB (Universal Serial Bus) cord.
  6. And wait for flashing to start by seeing the tab on SP Flash Tool loads with color red followed by color yellow. You will see a check mark pop up when it's done successfully.
Note:
When you click Download Button in SP Flash Tool and you see an error message pop-up,
BROM Error
,format the device first before flashing.

If you have questions, need assistance, or feedback, feel free to post your comments below.


See Also:


Widgets

Samsung Galaxy S4 (GT-i9505) Stuck At Boot Logo


Samsung Galaxy S4 (GT-i9505) Stuck At Boot Logo After Flashing Stock ROM in Odin


I flashed Samsung Galaxy S4 with stock ROM / firmware using Odin Flash Tool. Flashing was successful but it won't boot up past the Samsung Logo. I tried re-flashing it again but it is still the same.

Samsung Galaxy GT-i9505
Samsung Galaxy S4 - image by MZtech

How to fix Samsung S4 Stuck at Boot

1.) Thing you need before flashing:

ODIN Flash Tool. You can download Odin from HERE.

Stock firmware. You can download from Here.

GT-i9505 Pit File. Download. I have tested this file and it is working fine.

2.) Run Odin Flash Tool.

3.) Place your Pit File by clicking on the Pit tab.

4.) Extract your downloaded stock rom zip file and place it on PDA in ODIN.

5.) Put your phone in download mode and connect it to your PC with a USB cord.

     GT-i9505 Download Mode: Press and Hold Buttons: Volume Down, Menu, and Power.

6.) Click on Start. Once flashing is successful you will see a Pass displayed on your Odin and your device will reboot automatically.

Odin Flash Tool for Samsung
Odin Flash Tool - image by MZtech

7.) If you get stuck in the Samsung Boot Logo, remove the battery for at least a minute.

8.) Put back the battery in and put your phone in Recovery Mode.

     GT-i9505 Recovery Mode: Press and hold Buttons: Volume Up, Menu, and Power.

9.) Do a factory reset in recovery mode by scrolling using volume buttons and power button to select the wipe data and cache option.

10.) Once reset process is done, reboot your phone.

This process has fixed my phone. If you have questions, feel free to post a comment below. If you have tried the procedure above, I would be glad to hear from you.

See Also:

Widgets

OPlus O+ 8.31z Stock ROM / Firmware


Download O Plus (O+) 8.31z Stock ROM / Firmware

O Plus  8.31z Mobile
O+ Oplus 8.31z Mobile Photo by MZtech
O+ 8.31z is an Android Smartphone. It is manufactured by O+ USA and was released last 2013. It is one of the cheapest and affordable 3G Android Phone which only cost Php 2,995.00 on its first release. Because of its low resolution, it can only run some casual games. This phone works best for basic use like texting, calling and Internet browsing. Its main strength is its durability.

O Plus 8.31 z Specifications:

  • Display: 3.5" 320 x 480 (HVGA) capacitive touchscreen LCD TFT
  • Processor: 1 GHz Dual Core ARM Cortex A7-based MediaTek MT6577
  • Network: Dual SIM, 3G, HSDPA, HSUPA, Wi-Fi 802.11 b/g/n , Wi-Fi Hotspot, Bluetooth
  • O.S.: Android 4.2.2 Jelly Bean
  • Camera: Dual Camera with LED Flash, 3.2 MP back, 0.3 MP front
  • Stereo FM Radio, 3.5 mm Audio Jack
  • 256 MB RAM ; 256 MB ROM
  • 1,500 mAh (milliampere-hour) Li-Ion battery

How to Hard Reset O+ 8.31z:

  1. Turn off your phone.
  2. Press Power button and Volume Up button to enter recovery mode.
  3. If you see an android picture but no menu options, press power key to activate recover menu.
  4. Press volume down to navigate through the menu list.
  5. Press volume up to select Wipe Data/ factory reset
  6. Press volume down to highlight Yes and press volume up to select.
  7. After the reset process is done, select reboot phone by pressing volume up.
If Hard Reset didn’t fix your phone, then you have to flash it with its stock firmware / stock ROM to revive it back to its original factory state.

Things you will need to flash O+ 8.31z:

  • Flashing Tool - use SP Flash Tool to flash this phone. Download the tool by clicking on the download link below.

Download SP Flash Tool

Download Universal ADB Driver

Note: Click SKIP button on the upper right page after viewing ad for 5 seconds.

O+ 8.31z Stock ROM / Stock Firmware is hard to find so I decided to share it to anyone who might be needing this. I hope it could help you in fixing your phone.

If you have any questions or suggestions, feel free to post your comment below and if you find this post helpful, please don’t forget to click on like or share buttons.


Widgets

Firefly Mobile S60 V4 Stock ROM / Firmware Download


Download Firefly Mobile S60 V4 Stock ROM / Firmware and follow the steps on how to fix or reset it back to its factory state by flashing.

Firefly Mobile S60 V4
Firefly Mobile S60 image by MZtech

Firefly S60 V4 Specifications:

Phone Type

Smartphone

CPU

1.2 GHz Dual-Core ARM Cortex-A7

Smart Phone OS

Android 4.2 (Jelly Bean)

Camera

Dual Camera 2MP

SIM

Dual SIM


Chipset

MediaTek MT6572

Display

4.0” IPS Touchscreen

Network

GSM / HSPA / WLAN / Bluetooth

How to Hard Reset Firefly S60 V4 mobile:

If you are having problems with your phone like you are stuck up in boot logo, try fixing it first by doing a hard reset.
  1. Turn off your phone.
  2. Press Power button and Volume Up button to enter recovery mode.
  3. If you see an android picture but no menu options, press power key to activate recover menu.
  4. Press volume down to navigate through the menu list.
  5. Press volume up to select Wipe Data/ factory reset
  6. Press volume down to highlight Yes and press volume up to select.
  7. After the reset process is done, select reboot phone by pressing volume up.
If Hard Reset didn’t fix your phone, then you have to flash it with its stock firmware / stock ROM to revive it back to its original factory state.


Things you will need to flash Firefly S60 V4:

  • Firefly S60 V4 Stock ROM/ Stock Firmware.

Download Stock Firmware: 


  • Firefly S60 V4 scatter file.  - can be found in the extracted file of your downloaded Stock ROM / Stock Firmware zip file.
If Scatter File shows error or invalid, download scatter file below.


  • Flashing Tool
The flash tool you use in flashing is SP Flash Tool. You can download it by clicking the download link below.


(Note: When you click to download, view AdFly's ad page for 5 seconds and click Skip Ad button found on the upper right part of the page.)


If you encounter IMEI Invalid or no network connection issue after flashing your firmware with SP Flash Tool, read on:


http://mztech7.blogspot.com/2016/02/how-to-fix-invalid-imei-nvram-error.html
How To Fix Invalid IMEI
/NVRAM Error After Flash


Check out MediaFire to get up to 50GB of free online space.


If you have tried flashing your phone, feel free to post your feedback below. And if you encounter problems while flashing and you need help, I'll be very glad to assist you troubleshoot your phone.


Widgets

How To Identify Firmware Of A Dead China Tablet PC


You can easily identify firmware version of an Android Tablet by simply navigating to settings and selecting About Phone which can be found at the bottom of the settings options. So easy, right? But what if you’re tablet is dead, unable to boot, or stuck in logo boot loop? And the only way you could fix it is to flash it with its stock / factory firmware? How can you find where to get a copy of its firmware file if you don’t even know what firmware version to find?


White RoyQueen Android Tablet
RoyQueen Android Tablet
I had a 9 inch Royqueen German Technology PC Tablet running with Android OS which was stuck in boot logo. I did a hard reset but it didn’t fix the problem. I tried flashing it with a generic Android firmware since I couldn’t figure out its original version which made the problem worse. After flashing a wrong firmware, my Tablet is dead. It won’t turn on and all I could see is black screen. To fix it, I have to figure out its firmware version so I could start searching where I could get a copy of original firmware file.”


How To Identify Firmware Version Of A Dead Tablet?

  • Open the back case of the Tablet to see the motherboard and take note of its component.
Royqueen Tablet Motherboard

  • Identify the processor IC (Integrated Circuit) chip and take note of its Brand name and Part No.
Allwinner A13 Processor Chipset
Allwinner A13 processor - Photo by Mztech

The processor chip in the photo is identified as Allwinner Technology for its brand name and A13 as its part number. Some other processor types you may find are:Allwinner Technology A10, A20, A23, A31Rockchip RK2818, RK3368MediaTek MT6572, MT6588, etc.

  • Find the build number or board number.
Motherboard Build Number
Royqueen tablet motherboard build number -  Photo by Mztech

Build Number or Board Number show the version number and the manufacturing date. The build number shown in the photo is identified as A91v02-20121005.
  • Find the Manufacturer Information.
Touch Screen Flex Part Number
Royqueen tablet Touchscreen Flex - Photo by Mztech


On some tablet, there is a logo of the manufacturer company imprinted in the motherboard. But in my case, I haven't found any. I have figured out my manufacturer information using the details printed in my touchscreen flex. Using these information, I have figured out that my manufacturer is Maixin-China.


All the information gathered is the key to identify the firmware version.


Firmware version: AllWinner 13 (A13) MAPAN MX913 A91V02 20121005


Where can you get a copy of your original firmware file?

Visit the Manufacturer’s Website of your device. You have to know the model name and model number of your device so you could download the correct firmware version.But if you have a PC tablet made in China, identifying its firmware version is a problem. They usually are re-branded and do not have a Manufacturer website. You could not find its firmware version written on in the device.


If you are able to identify your correct firmware version, you can search from this list if it is available to download. 


To help you familiarize  more on different component, brand names, and part numbers , read my blog on:

tablet pc motherboard
Motherboard Component of China Tablet PC


Blogger Widgets